

You’ve scrolled through Pinterest for the hundredth time, staring at those gorgeous statement walls — bold patterns, rich textures, colors that actually make a room feel alive. And then you look at your own walls. White. Flat. Boring.
Here’s something most home décor guides won’t tell you upfront: fabric wallpaper is one of the most forgiving, affordable, and genuinely stunning wall treatments you can do yourself. No professional installer. No expensive paste. No irreversible commitment.
Whether you’re a renter who can’t touch the walls, a DIYer on a tight budget, or just someone who wants more creative control than commercial wallpaper offers — using fabric as wallpaper might be exactly what you’ve been looking for.
This guide covers everything. The methods, the materials, the mistakes to avoid, and the real-world tips that make the difference between a wall that looks custom and one that looks like a craft project gone wrong.
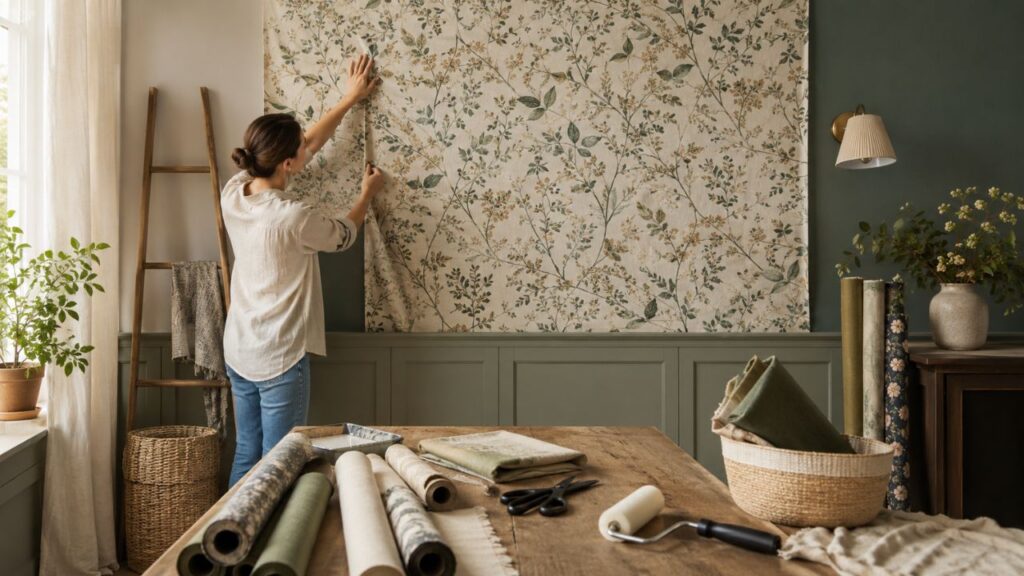
What Is Fabric Wallpaper, and Why Are People Choosing It?
Fabric wallpaper refers to any method of adhering fabric to a wall surface to create a decorative, textured, or pattern-rich finish. It’s not a new concept — textile wall coverings date back centuries in European and Asian interior design — but the modern DIY approach has made it accessible to anyone with a sewing store nearby and a free weekend.
The appeal is real and practical:
- Renters love it because most methods are fully removable
- Decorators love it because the texture and depth fabric adds simply can’t be replicated with paint
- Budget-conscious homeowners love it because a yard of fabric costs a fraction of designer wallpaper
- Crafters love it because there’s genuine creative freedom in choosing your own print, weight, and finish
Commercial wallpaper fabric (fabric-backed wallcovering used in hospitality and commercial spaces) has been a staple in the interior design industry for decades. But the residential DIY wave has taken the concept somewhere far more interesting — and far more personal.
Methods for Using Fabric as Wallpaper
There’s no single “right” way to do this. The best method depends on your wall type, whether you rent or own, your budget, and how permanent you want the result to be. Here are the main approaches.
1. Liquid Starch Fabric Wallpaper (The Renter’s Best Friend)
If you’ve never heard of liquid starch fabric wallpaper, prepare to have your mind slightly blown.
Liquid starch — yes, the laundry product — acts as a temporary adhesive that holds fabric firmly against a wall but peels off cleanly when you’re ready to remove it. No damage, no residue, no lost security deposit.
How it works:
Liquid starch (brands like Sta-Flo are commonly used) is diluted slightly with water, applied to the back of the fabric or directly to the wall, and the fabric is smoothed on in sections. Once dry, it holds remarkably well.
What you’ll need:
- Liquid starch (available at most grocery or hardware stores)
- Fabric of your choice (pre-washed and ironed flat)
- A paint roller or large sponge brush
- A plastic smoothing tool or credit card
- A level and measuring tape
- Sharp scissors or a rotary cutter
Step-by-step process for liquid starch fabric wallpaper:
- Prep your wall. Clean it, let it dry completely. Fill any large holes.
- Measure and cut your fabric into panels slightly larger than your wall height — leave about an inch of overhang top and bottom.
- Apply liquid starch to the wall section with a roller, working in roughly 2-foot-wide strips.
- Press the fabric onto the wet starch, starting at the top and smoothing downward with your hands or a smoothing tool.
- Overlap seams slightly (about ½ inch) for a cleaner look, or align patterns carefully before the starch dries.
- Trim the excess at the ceiling and baseboard once the fabric is positioned and mostly dry.
- Let it dry fully — usually 24 hours — before touching up any lifting edges.
The result is a crisp, flat finish that looks far more intentional than most people expect from a starch-and-fabric combo. The liquid starch fabric wallpaper method is hands-down the most popular DIY approach for good reason.
Removal: Simply dampen the fabric with water, and it peels right off. The starch reactivates with moisture and releases from the wall cleanly.
2. Fabric Wallpaper Peel and Stick (Pre-Made & DIY Options)
Fabric wallpaper peel and stick products have exploded in popularity over the last several years. You can now buy fabric-textured peel-and-stick wallpaper from brands like Tempaper, NuWallpaper, and RoomMates — most of them stocked at Target, Home Depot, and Wayfair.
But there’s also a DIY version: applying a peel-and-stick adhesive backing to your own fabric.
Pre-made peel and stick fabric wallpaper pros:
- Consistent adhesion across the whole panel
- No mess, no drying time
- Easily repositionable during installation
- Wide range of fabric-look textures (linen, grasscloth, burlap effects)
DIY peel and stick approach: You can purchase iron-on or peel-and-stick fabric stabilizer (like Pellon or similar fusible products) and apply it to the back of your chosen fabric. This turns almost any fabric into a fabric wallpaper peel and stick product.
This method works especially well for smaller accent walls, headboard walls, or areas where you want a very specific fabric pattern that isn’t available commercially.
One honest caveat: Peel-and-stick adhesive can be temperamental on textured walls. It bonds best to smooth, primed drywall or painted plaster. On heavily textured surfaces, liquid starch or a paste method often gives better results.
3. Fabric Paste Method (For Permanent or Semi-Permanent Installation)
If you own your home and want a long-lasting result, applying fabric with wallpaper paste or diluted PVA glue gives the most durable finish. This is essentially the same principle behind commercial wallpaper fabric installation.
The fabric is treated like standard wallpaper — pasted, hung in panels, seams aligned, edges trimmed. The result can last years without peeling, and it accepts paint over it if you ever want to change the look.
This method works best with woven fabrics that have low stretch — linen, canvas, and cotton duck are popular choices. Heavily stretchy fabrics like jersey or knit don’t paste well because they distort as they dry.
4. Stretched Fabric Panels and DIY Fabric Wall Frames
Not every diy fabric wall approach involves adhesive at all. Stretched fabric panels — fabric pulled taut over a wooden frame and mounted to the wall — give a clean, gallery-style look that’s fully removable and endlessly swappable.
This is a particularly good option for large statement walls where you want the fabric to breathe slightly (helpful in humid rooms) or where wall adhesion is genuinely difficult (like brick or stone).
Basic process:
- Build or buy canvas stretcher bars in your desired panel size
- Stretch your fabric over the frame, stapling it to the back
- Mount the frames with picture-hanging hardware
The diy fabric wall panel approach also works well in layers — mounting multiple smaller panels at staggered heights creates a gallery wall effect with textile rather than artwork.
How to Wallpaper With Fabric: Choosing the Right Material
How to wallpaper with fabric successfully starts long before you touch a wall. The fabric you choose makes or breaks the result.
Best Fabric Types for Wall Applications
| Fabric Type | Adhesion | Pattern Alignment | Best Method | Notes |
|---|---|---|---|---|
| Cotton (woven) | Excellent | Easy | Starch, paste, peel-stick | Most versatile choice |
| Linen | Excellent | Moderate | Paste, starch | Slightly textured finish |
| Canvas / Duck | Good | Easy | Paste | Very durable, paintable |
| Burlap | Moderate | N/A | Frames, staple | Rustic texture, frays easily |
| Velvet | Poor-Moderate | Tricky | Frames only | Luxury look, difficult to paste |
| Jersey / Knit | Poor | Difficult | Not recommended | Stretches and distorts |
| Muslin | Good | Easy | Starch, paste | Great for painted or printed designs |
Tips for Choosing Fabric for Wallpaper Projects
- Pre-wash your fabric before installation. All fabric shrinks somewhat, and you do not want that happening after it’s on your wall.
- Iron it completely flat — creases and wrinkles become permanent once adhered.
- Choose patterns with a straight repeat — diagonal or irregular patterns are much harder to align across panels.
- Avoid very sheer or loosely woven fabrics unless you’re using the panel/frame method. They telegraph every wall imperfection underneath.
- Test adhesion on a small patch before committing to a full wall, especially with peel-and-stick.
How to Hang Fabric on Walls: Room-by-Room Considerations
How to hang fabric on walls isn’t a one-size-fits-all question. The room matters.
Bedrooms
The most popular application. A fabric-covered headboard wall creates warmth and acoustic softness that paint simply can’t. Liquid starch and peel-and-stick methods both work well here. Choose lighter-weight fabrics in bedrooms for easier installation and a softer look.
Living Rooms
Here, covering walls with fabric often becomes a focal point. Bold prints, geometric patterns, and rich textures read well in living spaces. In larger rooms, the paste method is worth considering for its durability. Panel frames work particularly well if you want to mix fabric with other wall art.
Dining Rooms
Fabric absorbs sound, which makes it genuinely useful in dining rooms where hard surfaces create echo. This is one case where a semi-permanent paste installation makes practical sense even for renters willing to accept minor touch-up costs at move-out.
Rental Apartments
Liquid starch and peel-and-stick are your options here. Both remove cleanly from well-prepped smooth walls. Always test removal in a hidden spot before committing. Some landlords are more accommodating than others — a quick conversation before starting is always worth the five minutes.
Nurseries and Kids’ Rooms
Covering a wall with fabric in a child’s room is a brilliant idea — fabric is soft, sound-absorbing, and easy to swap as the child grows. Liquid starch is ideal here because the wall treatment can change as tastes change without any repainting.
Can You Wallpaper a Door?
Yes — and this is one of those questions that comes up constantly. Can you wallpaper a door? Absolutely, and fabric handles doors even better than traditional wallpaper in some ways.
Flat interior doors (hollow-core or solid) can be covered with fabric using:
- Liquid starch (works well on painted doors)
- Peel-and-stick adhesive-backed fabric
- Spray adhesive for a more permanent result
Key considerations for fabric on doors:
- The door surface must be clean and lightly sanded if the existing paint is glossy
- Fabric edges need to be wrapped around to the back of the door or trimmed very cleanly at the edges — this is the area where most DIY door projects go wrong
- Heavy use doors (exterior, high-traffic interior) will wear the fabric at edges and corners fairly quickly
- For decorative statement doors — like a pantry door or a reading nook door — fabric wallpaper adds incredible character at minimal cost
The same technique used for diy wall paper on regular walls applies directly to doors. Measure, cut slightly oversized panels, apply adhesive, smooth, trim. The only real difference is managing the hardware cutouts around handles and hinges.
Step-by-Step: Covering a Wall With Fabric Using Liquid Starch
Let’s walk through a complete wall project using the most popular method. This is a standard bedroom accent wall — roughly 10 feet wide by 8 feet tall.
Materials Checklist
- 4–5 yards of 54″-wide fabric (depending on pattern repeat)
- 1 quart liquid starch
- Paint roller and tray
- Plastic smoother or wide putty knife
- Level, measuring tape, pencil
- Sharp scissors and/or rotary cutter with mat
- Step stool or small ladder
- Drop cloth for the floor
The Process
Step 1: Measure and plan Divide your wall width by the fabric width (usually 44–60 inches). A 10-foot wall with 54-inch fabric needs roughly 3 panels. Add 2 inches height overhang per panel. Account for pattern repeats if applicable — factor in an extra half-repeat per panel.
Step 2: Pre-wash and iron Wash fabric in cool water, tumble dry on low. Iron completely flat. This step gets skipped more than any other, and it causes more problems than any other.
Step 3: Mark your wall Use a level and pencil to mark vertical lines where each panel edge will fall. Starting plumb is critical — even a slightly off-vertical first panel cascades into visible problems by the third panel.
Step 4: Apply starch and hang panels Working one panel at a time, roll liquid starch onto the wall section. Press the fabric from the top down, smoothing constantly with your plastic tool. Keep a damp cloth nearby to wipe starch off the face of the fabric immediately.
Step 5: Align seams For pattern fabrics, overlap the seam edge of the second panel over the first, align the pattern, then use a sharp knife and straightedge to cut through both layers simultaneously. Remove the two small strips of fabric from behind and in front — you now have a perfect pattern-matched butt seam.
Step 6: Trim and finish Once all panels are up and dry (give it 24 hours), trim top and bottom edges with a fresh blade against a metal straightedge. Tuck edges behind baseboards and crown molding where possible.
Sheet Wallpaper: Using Bed Sheets and Flat Fabric as Wall Covering
Sheet wallpaper is a specific application worth calling out because it’s one of the most budget-friendly options available. Standard bed sheets — particularly flat sheets in interesting patterns or colors — work beautifully for using fabric as wallpaper.
A queen flat sheet (typically 90″ x 102″) covers a significant portion of a standard wall. Patterned sheets from brands like Anthropologie Home, IKEA’s KUNGSBLOMMA line, or thrift store finds in vintage prints can create statement walls for under $20.
The process is identical to any other fabric wallpaper project — the sheet is treated like any other woven cotton fabric. Pre-wash, iron, apply with your chosen method.
One advantage of using flat sheets: The edges are already finished (hemmed), which makes trimming at ceiling and floor lines cleaner in some installations.
Common Mistakes When Covering Walls With Fabric
Covering walls with fabric is forgiving — but not infinitely so. Here are the mistakes that trip people up most consistently.
Skipping the pre-wash. Fabric shrinks. On a wall, that means lifting edges and bubbling. Always wash first.
Not using a level from the start. Vertical panels that aren’t plumb become more visibly tilted with every panel added. Check plumb constantly.
Using fabric with too much stretch. Stretch fabrics sag, distort, and don’t adhere flat. Stick with stable woven fabrics.
Rushing the drying time. Liquid starch needs a full day to cure properly. Trimming too early means the fabric shifts.
Ignoring humidity. Bathrooms and other high-humidity spaces will cause most fabric adhesives to fail over time. Fabric panels (stretched over frames) are a better solution in wet areas.
Overloading with starch. More starch doesn’t mean better adhesion — it means a stiff, slightly shiny fabric finish that looks off. A moderate coat is plenty.
DIY Fabric Wall: Budget Breakdown
One of the most common questions: what does a diy fabric wall actually cost?
Here’s a realistic breakdown for a 10′ × 8′ accent wall using the liquid starch method:
| Item | Approximate Cost |
|---|---|
| Fabric (4 yards at $8–15/yard) | $32–$60 |
| Liquid starch (1 quart) | $4–$6 |
| Roller and tray (if needed) | $8–$12 |
| Miscellaneous (tape, drop cloth) | $5–$10 |
| Total | $49–$88 |
Compare that to commercial wallpaper for the same wall: $80–$300+ for the paper alone, plus paste, primer, and tools. Designer wallpaper from brands like Cole & Son, Farrow & Ball, or Schumacher can run $150–$400 per roll — and a standard room needs 8–12 rolls.
The cost difference for fabric wallpaper diy projects is genuinely significant.
FAQ: Your Top Questions Answered
Is fabric wallpaper safe for walls?
Yes — especially the liquid starch method, which is fully removable and leaves no wall damage. Even paste methods cause no more wall stress than conventional wallpaper.
How long does liquid starch fabric wallpaper last?
In low-humidity rooms, a liquid starch installation can hold cleanly for 2–5 years without peeling. High humidity or direct sunlight shortens the lifespan somewhat.
Can I use any fabric for wallpaper?
Most stable woven fabrics work well. Cotton, linen, canvas, and muslin are the most reliable. Avoid stretchy knits, very sheer fabrics, or loosely woven open-weave textiles.
Does fabric wallpaper peel and stick work on textured walls?
It works best on smooth or lightly textured surfaces. Heavily textured walls (orange peel, knockdown, popcorn) reduce adhesion significantly. Liquid starch over texture performs better than peel-and-stick.
Can you wallpaper a door with fabric?
Absolutely. Flat interior doors are ideal candidates. Use peel-and-stick adhesive, liquid starch, or spray adhesive. Trim edges carefully and wrap fabric around the door’s edge for a clean finish.
How do I remove fabric wallpaper without damaging my walls?
For liquid starch: dampen the fabric with a sponge, wait a few minutes, and peel away. The starch rehydrates and releases cleanly. For peel-and-stick: peel slowly at a low angle, pulling back toward the installed section rather than outward.
What is sheet wallpaper?
Sheet wallpaper refers to using flat fabric sheets — often bed sheets or wide fabric panels — as wall covering material, applied using any of the standard fabric wallpaper methods.
How to hang fabric on walls without adhesive?
The stretched panel/frame method requires no wall adhesive. You build or buy canvas frames, stretch fabric over them, and hang them like artwork. Curtain rod mounting is another non-adhesive option for draped fabric walls.